

SendFox WordPress integration is your secret weapon for building an email list easily. This guide shows you exactly how to connect them in simple steps, so you can start growing your audience today.
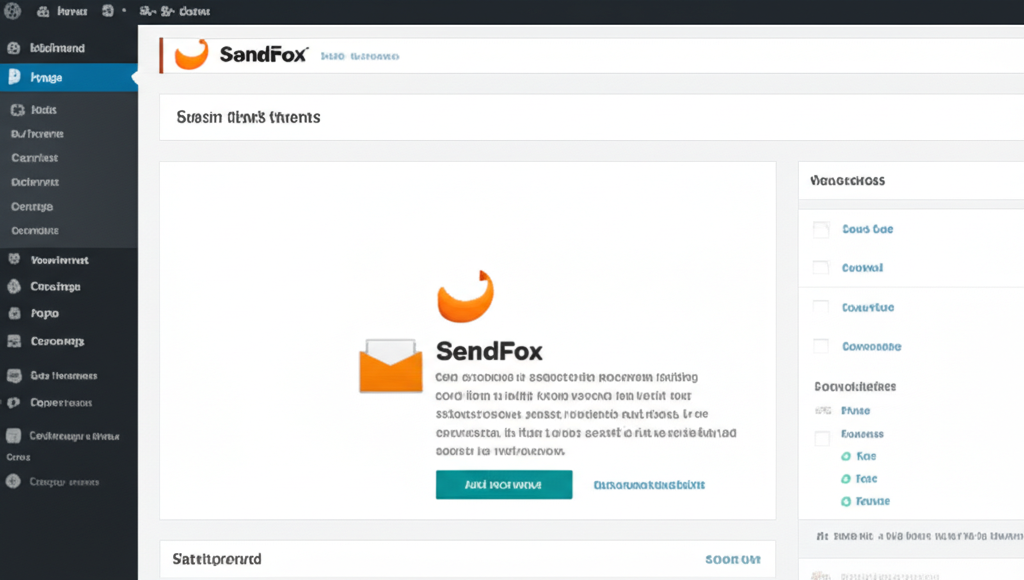
SendFox WordPress: Essential Integration for Beginners
Are you a small business owner or entrepreneur looking to connect with your audience through email but feeling a bit lost? You’re not alone! Many people find setting up email marketing tools a bit confusing. You might have heard about SendFox and how great it is for creators, and you already use WordPress for your website. The big question is: how do you get them to talk to each other?
Don’t worry! This article is here to break down the process of integrating SendFox with your WordPress site. We’ll walk you through each step so you can easily add signup forms to your website and start collecting email addresses. By the end of this guide, you’ll feel confident in connecting your SendFox account to your WordPress blog, opening the door to a more engaged audience and better communication.
Contents
Why Integrate SendFox with WordPress?
Think of your website as the storefront for your business. Your email list is like your customer contact book. Integrating SendFox with your WordPress site is like setting up a super-efficient way to get new contacts into that book directly from your storefront.
Here’s why this connection is so important:
- Grow Your Audience: Easily capture leads (people interested in your business) who visit your website.
- Stay Connected: Keep your audience updated with new blog posts, offers, or news directly in their inbox.
- Build Relationships: Nurture leads and turn them into loyal customers by consistently providing value through email.
- Simple Management: Manage all your subscribers in one place (SendFox) directly from your WordPress site.
SendFox is known for being affordable and straightforward, making it a fantastic choice for beginners. When you link it with your WordPress website, you create a powerful, yet simple, system for email marketing.
Getting Started: What You’ll Need

Before we dive into the integration steps, let’s make sure you have everything ready:
- A SendFox Account: If you don’t have one, signing up is quick and easy. SendFox offers a free plan to get you started!
- A WordPress Website: Your website should be live and accessible.
- Admin Access to Your WordPress Site: You’ll need to be able to log in and make changes to your website.
Step-by-Step: Integrating SendFox with WordPress
There are a few ways to connect SendFox to your WordPress site. We’ll cover the most common and beginner-friendly methods. The easiest way is usually by using a plugin, or by directly embedding a SendFox form.
Method 1: Using a Plugin (Recommended for Beginners)
Plugins are like helpful tools for your WordPress site that add new features. For SendFox, there isn’t an official “SendFox WordPress Plugin” directly from SendFox itself, but many general form plugins can integrate with SendFox. The most straightforward way is to use SendFox’s built-in embedding features, which work perfectly with most WordPress setups.
Let’s focus on embedding a form directly, as this is the most universal and reliable method without needing extra plugins for the connection itself.
Method 2: Embedding a SendFox Form Directly into WordPress
This method involves creating a signup form in your SendFox account and then copying a piece of code (called an embed code) to paste into your WordPress website. It’s like telling your website, “Show this signup box here!”
Step 1: Create Your Signup Form in SendFox
First, you need to create the actual form that people will see on your website.
- Log in to your SendFox Account: Go to the SendFox website and log in.
- Navigate to “Forms”: On the left-hand side menu, you should see an option for “Forms.” Click on it.
- Create a New Form: Click the “+ New Form” button.
- Choose Your Form Type: SendFox offers different types of forms. For embedding on a page or post, a “Landing Page” or a simple “Embedded Form” works best. Let’s choose “Embedded Form” for placing it within your content.
- Design Your Form:
- Welcome Message: Add a clear, inviting message. Something like “Join our newsletter for exclusive tips!”
- Input Fields: You’ll usually have at least an “Email” field. You can add “First Name” if you want to personalize emails later.
- Button Text: Customize the button text, like “Subscribe,” “Sign Me Up,” or “Get Updates.”
- Branding: You can often customize colors to match your website.
- Configure Form Settings:
- Add to List: Crucially, choose which list in SendFox this form should add subscribers to.
- Redirect URL: After someone subscribes, you can redirect them to a “Thank You” page on your website or a specific URL. This is a good practice!
- Save Your Form: Once you’re happy with the design and settings, click “Save.”
Step 2: Get the Embed Code from SendFox
After saving your form, SendFox will generate the code you need.
- Locate Your Saved Form: Go back to the “Forms” section in SendFox. You should see the form you just created.
- Find the “Embed” or “Share” Option: Next to your form, there will be an option to get the code. It might say “Embed,” “Share,” or show an “Embed” icon. Click on it.
- Copy the Code: SendFox will display a block of code. This is usually HTML. There will be a button to “Copy Code” or a text area you can select and copy from. Make sure you copy the entire block of code. It will look something like this (this is just an example, your code will be specific to your form):
<form action="https://sendfox.com/f/YOUR_FORM_ID" method="post">
  <input type="email" name="email" placeholder="Enter your email" required>
  <button type="submit">Subscribe</button>
</form>
Important Tip: Look for the code that’s specifically for embedding within a website, not for a full landing page. It’s usually a shorter snippet.
Step 3: Add the Embed Code to Your WordPress Website
Now it’s time to put that code into your WordPress site. You can add it to a specific page, a blog post, or even your sidebar.
Option A: Adding to a Page or Blog Post
- Log in to your WordPress Admin Dashboard.
- Go to “Pages” or “Posts”: Depending on where you want the form, navigate to “Pages” > “All Pages” or “Posts” > “All Posts.”
- Edit or Create a New Page/Post: Click “Edit” on an existing page/post or click “Add New” to create a new one.
- Switch to the “Text” or “Code” Editor: This is the most crucial step! In the WordPress editor (this might be the Classic Editor or the Gutenberg Block Editor), you need to find the option to switch to a code editor.
- Classic Editor: Look for tabs at the top right of the content area that say “Visual” and “Text.” Click on “Text.”
- Gutenberg (Block) Editor: Add a new block. Search for the “Custom HTML” block.
- Paste the SendFox Embed Code: In the “Text” or “Custom HTML” editor, paste the code you copied from SendFox.
- Preview and Publish/Update:
- If using the Classic Editor, switch back to the “Visual” tab to see how it looks (though sometimes it might not render perfectly until published).
- If using Gutenberg, you’ll see a preview in the Custom HTML block.
- Click “Update” or “Publish” to save your changes.
Option B: Adding to a Widget Area (like your Sidebar)
This is great for having your signup form visible on every page.
- Log in to your WordPress Admin Dashboard.
- Go to “Appearance” > “Widgets.”
- Find a Text Widget: In the available widgets section, look for a “Text” widget (or “Custom HTML” widget if available).
- Drag the Widget: Drag the “Text” or “Custom HTML” widget to your desired widget area (e.g., “Sidebar,” “Footer”).
- Paste the SendFox Embed Code: In the widget’s content area, paste the code you copied from SendFox.
- Save the Widget: Click “Save” on the widget.
Now, visit your website’s front end to see your SendFox signup form in action!
Extra Tips for a Successful SendFox WordPress Integration
Getting the form on your site is just the start. Here are a few tips to make your email list building even more effective:
- Clear Call to Action: Make sure your form’s button and surrounding text clearly tell people what they’ll get by signing up.
- Offer an Incentive: Consider offering a “lead magnet” – a freebie like an ebook, checklist, or discount code – in exchange for their email address. Mention this near your form!
- Strategic Placement: Don’t just put the form anywhere. Place it prominently on your homepage, at the end of blog posts, or in your sidebar where visitors are likely to see it.
- Mobile-Friendly Design: Most people browse on their phones. Ensure your SendFox form looks good and is easy to use on mobile devices. SendFox forms are usually responsive by default, but it’s always good to check.
- Thank You Page: Use the redirect feature in SendFox to send new subscribers to a dedicated “Thank You” page on your website. This page can welcome them, tell them what to expect, and even offer a next step.
Common Mistakes to Avoid
Even with simple steps, it’s easy to make small errors that can affect how well your forms work. Be mindful of these:
- Pasting Code into the Visual Editor: Always use the “Text” or “Custom HTML” editor in WordPress. Pasting HTML code into the visual editor will likely break your formatting or display the code as plain text.
- Not Testing Your Form: After embedding, always test it yourself! Sign up with a different email address to make sure it works, adds you to the correct SendFox list, and redirects properly.
- Overly Complicated Forms: For initial signup, keep forms simple. Asking for too much information upfront can deter people from subscribing. Start with just email, or email and name.
- Ignoring Your List: Once you start collecting emails, remember to actually send emails! An inactive list is no good. Plan a simple email schedule.
Frequently Asked Questions (FAQ)
Here are some common questions beginners have about SendFox and WordPress integration:
Q1: Do I need a special plugin to connect SendFox to WordPress?
A1: Not necessarily. You can directly embed SendFox’s form code into your WordPress pages, posts, or widgets using the built-in “Text” or “Custom HTML” editor. This is the most straightforward method.
Q2: Can I use SendFox with the free version of WordPress.com?
A2: If you are on a WordPress.com plan that allows custom code (typically the Business plan or higher), you can embed forms. For free WordPress.com sites, you might be limited in embedding custom code. It’s best to check your specific WordPress.com plan’s capabilities.
Q3: How many subscribers can I start with on SendFox?
A3: SendFox is known for its generous free plan, which often allows you to start with a good number of subscribers (check their current terms, but it’s typically around 1,000 or more) and send a certain number of emails per month. This is fantastic for beginners.
Q4: Can I automate emails from my SendFox WordPress integration?
A4: Yes! Once subscribers are in your SendFox account, you can set up automated email sequences (like a welcome series) directly within SendFox. The integration ensures new subscribers are automatically added to your SendFox account to receive these automations.
Q5: What if the form doesn’t look right on my website?
A5: First, double-check that you pasted the code correctly into the “Text” or “Custom HTML” editor. If it still looks off, SendFox’s embedded forms are generally designed to be responsive, but sometimes theme conflicts can occur. You might need to adjust your WordPress theme’s CSS or consider a more advanced form plugin if you experience persistent styling issues.
Q6: Should I put the form on every page?
A6: It’s a good idea to have signup forms in visible locations like your homepage, sidebar, and at the end of blog posts. Having too many forms on a single page can be overwhelming, so be strategic with placement.
Conclusion
Integrating SendFox with your WordPress website is a powerful step towards building a direct connection with your audience. By following these simple steps to embed your SendFox forms, you can start collecting valuable leads without needing to be a tech expert.
Remember, the key is to create a welcoming signup experience, place your forms strategically, and then nurture your new subscribers with valuable content. You’ve got this!
Ready to start? Log in to your SendFox account, create your first form, grab that embed code, and paste it into your WordPress site. Your email list awaits!