

Forwarding an email in Outlook is a common task for many users. It allows you to share information quickly and easily.
When you forward an email in Outlook, you might wonder what happens behind the scenes. Does the original sender see that you forwarded their email? What happens to the attachments? Understanding these details can help you use email more effectively.
In this blog post, we’ll explore the ins and outs of forwarding emails in Outlook. We’ll cover what changes, what stays the same, and any privacy concerns you should be aware of. By the end, you’ll have a clear picture of how forwarding works and feel more confident in using this feature.
Email Forwarding Basics
Email forwarding is a simple yet powerful feature in Outlook. It allows you to share an email you received with others. Understanding the basics of email forwarding can help you manage your emails better. Let’s dive into what email forwarding is and why you should use it.
What Is Email Forwarding?
Email forwarding is the process of re-sending an email you received to another email address. Instead of composing a new email, you can forward the original message with a single click. This feature keeps the original content intact, including attachments and formatting. When you forward, file attachments are included; cloud files (OneDrive/SharePoint) are sent as shareable links based on your organization’s default permissions (Microsoft Support, accessed 2025-09-16).
Forwarding an email is useful for sharing important information quickly. It saves time and ensures that the recipient gets the exact message you received. In Outlook, you can forward an email by clicking the “Forward” button. Then, enter the recipient’s email address and click “Send”.
Why Forward Emails?
There are several reasons to forward emails:
- Sharing information: You can quickly share important details with colleagues or friends.
- Delegating tasks: Forward emails to team members to delegate tasks or responsibilities.
- Keeping records: Forward emails to another account for backup or record-keeping purposes.
- Clarifying issues: Forward emails to seek clarification or additional information from others.
Forwarding emails helps streamline communication and ensures everyone stays informed. It is an essential tool for both personal and professional email management.
Using email forwarding effectively can improve productivity and collaboration. It keeps everyone on the same page and reduces the need for follow-up emails. Start using email forwarding in Outlook today to see the benefits for yourself.
Contents
- 1 Setting Up Forwarding In Outlook
- 2 Privacy Considerations
- 3 Professional Etiquette
- 4 Handling Attachments
- 5 Managing Recipients
- 6 Choosing The Right Recipients
- 7 Editing Forwarded Emails
- 8 Making Necessary Edits
- 9 Adding Personal Notes
- 10 Avoiding Forwarding Mistakes
- 11 Automating Email Forwarding
- 12 Troubleshooting Forwarding Issues
- 13 Frequently Asked Questions
- 14 Conclusion
Setting Up Forwarding In Outlook
Setting up forwarding in Outlook can help you manage your emails more efficiently. Whether you want to forward certain emails to another address or automate the process, Outlook provides several options. Below is a detailed guide to help you set up email forwarding effortlessly.
Step-by-step Guide
- Open Outlook and sign in to your account.
- Click on the Settings icon at the top right corner.
- From the dropdown menu, select View all Outlook settings.
- In the settings menu, choose Mail and then Forwarding.
- Check the box for Enable forwarding.
- Enter the email address you want to forward emails to.
- Click Save to apply the settings.
Following these steps will enable email forwarding in Outlook. This basic setup works for most users. Reference: Microsoft Support — Turn on automatic forwarding in Outlook (accessed 2025-09-16).
Customization Options
Outlook also provides several customization options to tailor the forwarding process:
| Option | Description |
|---|---|
| Keep a copy of forwarded messages | Retains a copy in your inbox while forwarding to another address. |
| Forward specific emails | Create rules to forward only emails that meet certain criteria. |
| Automatic replies | Set up automated responses to inform senders about your forwarding settings. |
These customization options allow you to control which emails get forwarded and how you manage them. For instance, you can set rules to forward only work-related emails or emails from specific contacts.
By understanding and utilizing these features, you can streamline your email management in Outlook.
Privacy Considerations
Forwarding emails in Outlook can often raise privacy concerns. It’s important to be aware of these considerations to protect sensitive information and maintain confidentiality.
Sensitive Information
When forwarding an email, always check for sensitive information. This could include personal data, financial details, or login credentials. Removing or redacting this information helps prevent unintended recipients from accessing it.
- Personal data: names, addresses, phone numbers
- Financial details: bank account numbers, credit card information
- Login credentials: usernames, passwords
Confidentiality Concerns
Confidentiality is another key concern. Emails often contain confidential information meant only for certain individuals. Before forwarding, ensure the recipients are authorized to view this information.
Consider the following steps to maintain confidentiality:
- Review the email content thoroughly.
- Remove any confidential attachments or details.
- Use BCC to hide recipient addresses.
These steps help protect the privacy of the original sender and other parties involved.
Outlook does not send an automatic notification to the original email sender when you forward a message (see Microsoft’s forwarding guidance: Outlook on the web, accessed 2025-09-16). Exception: forwarding a meeting invitation usually notifies the organizer (Microsoft Support, accessed 2025-09-16). If in doubt, ask before forwarding.

Professional Etiquette
Forwarding an email in Outlook requires attention to professional etiquette. It’s crucial to maintain a respectful and courteous tone. You must also consider the original sender’s intentions and privacy. Let’s discuss the key elements of professional etiquette.
Using Appropriate Tone
When forwarding an email, ensure your tone matches the context. Use a formal and respectful tone for business communications. Here’s how you can achieve this:
- Avoid using slang or informal language.
- Address the recipient by their proper title.
- Keep your message concise and clear.
Using the right tone creates a positive impression. It shows you respect the recipient and the original sender.
Respecting Original Sender
Respecting the original sender is vital when forwarding emails. Never alter the original message without permission. Here are some guidelines to follow:
- Include the original sender’s details.
- Do not remove any part of the original email.
- Seek permission before forwarding confidential information.
Respecting the original sender builds trust. It shows that you value their privacy and intentions.
Handling Attachments
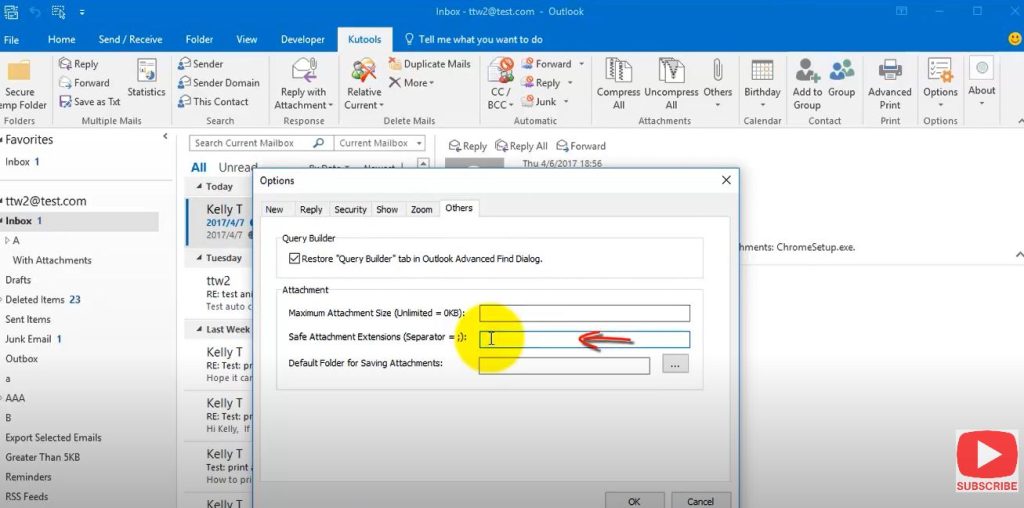
In Outlook, forwarding an email includes the original attachments by default (Microsoft Support, accessed 2025-09-16). If the message uses cloud attachments (OneDrive/SharePoint), those forward as links and recipients need permission to open them—verify access before sending (Microsoft Support, accessed 2025-09-16). Always check that files or links are present and accessible.
Checking File Relevance
Before forwarding an email, check if the attachments are relevant. Ask yourself: Do these files need to be sent? Is the information still current? By reviewing each attachment, you can decide which files are important for your recipient.
Consider creating a table to list attachments:
| File Name | Type | Relevance |
|---|---|---|
| Report.pdf | High | |
| Image.png | Image | Low |
Removing Unnecessary Attachments
Sometimes, emails come with large or multiple attachments. These may not always be needed. Removing unnecessary files can make your email clean and easy to understand.
Here’s a quick guide on how to remove attachments in Outlook:
- Open the email you want to forward.
- Click on the attachment you want to remove.
- Press the Delete key on your keyboard.
- Ensure only the relevant attachments remain.
By following these steps, your forwarded email will be more concise and relevant.
Managing Recipients
When forwarding an email in Outlook, managing recipients is crucial. You must ensure the right people receive the correct information.When you forward an email in Outlook, it does not resend the message to everyone from the original list. Only the new people you add will receive it. However, the email may still show names or addresses from the original if they were part of the visible thread. Always check before sending. Below are helpful tips for managing recipients effectively.
Choosing The Right Recipients
It is important to select the right recipients for your forwarded email. Consider who needs to know the information.
- Use the “To” field for the main recipients.
- Think about whether all recipients need to respond.
- Ensure you have the correct email addresses.
Using Cc And Bcc Wisely
CC and BCC fields can help manage email visibility. Use them wisely to maintain privacy and relevance.
| Field | Usage |
|---|---|
| CC | Use for recipients who need to be informed but not directly involved. |
| BCC | Use for recipients who need the email but should stay hidden from others. |
Remember, the CC field makes all recipients visible to each other. The BCC field keeps them hidden. This helps maintain email privacy and reduces unnecessary replies.
Editing Forwarded Emails
Editing forwarded emails in Outlook can make your messages clearer and more personalized. This process allows you to make necessary adjustments and add personal touches. Learn how to make your forwarded emails more effective with these simple steps.
Making Necessary Edits
When forwarding an email, you might need to change some details. This can include removing irrelevant information or fixing any mistakes. Follow these steps to make necessary edits:
- Open the email you want to forward.
- Click on the “Forward” button.
- Make the required changes in the email body.
- Remove any unnecessary attachments.
- Check for spelling and grammar errors.
- Click “Send” when you’re ready.
By making these edits, you ensure your email is clear and concise.
Adding Personal Notes
Adding personal notes can make your forwarded email more engaging. Here is how you can add personal notes:
- At the top of the email, include a greeting.
- Add a brief message explaining why you’re forwarding the email.
- Include any additional information that might be helpful.
- Sign off with your name or a friendly closing.
Adding personal notes can help the recipient understand the context and importance of the forwarded email.
| Step | Action |
|---|---|
| 1 | Open the email |
| 2 | Click “Forward” |
| 3 | Add personal notes |
| 4 | Make necessary edits |
| 5 | Send the email |
Using these methods, you can make your forwarded emails more effective and engaging. Keep your emails clear, concise, and personal for the best results.
Avoiding Forwarding Mistakes
Forwarding emails in Outlook is a common task. But mistakes can occur. Simple errors can cause confusion or even breach confidentiality. Avoiding these mistakes is crucial for efficient communication.
Common Pitfalls
Here are some common pitfalls when forwarding emails in Outlook:
- Accidentally forwarding sensitive information: Forwarding without checking the content can lead to sharing confidential details.
- Ignoring attachments: Sometimes, attachments are left out, causing confusion.
- Incorrect recipients: Sending emails to the wrong person is a frequent mistake.
- Unnecessary information: Forwarding long email chains can clutter the recipient’s inbox.
How To Prevent Errors
Preventing these errors is simple with a few practices:
- Review email content: Always check the email content before forwarding.
- Verify recipients: Double-check the recipient list to ensure correctness.
- Include necessary attachments: Ensure all relevant attachments are included.
- Trim email chains: Remove irrelevant parts of the email chain to keep the message clear.
By following these steps, you can avoid common forwarding mistakes and ensure clear communication in Outlook.
Automating Email Forwarding
Automating email forwarding in Outlook can save you time and effort. It ensures important messages reach the right people without manual intervention. This guide will show how to set up automated email forwarding using rules and filters. We will also discuss the pros and cons of automating this process.
Using Rules And Filters
In Outlook, rules and filters help automate email forwarding. These tools allow you to specify conditions under which emails should be forwarded. Here is a step-by-step guide to setting up rules and filters for email forwarding in Outlook:
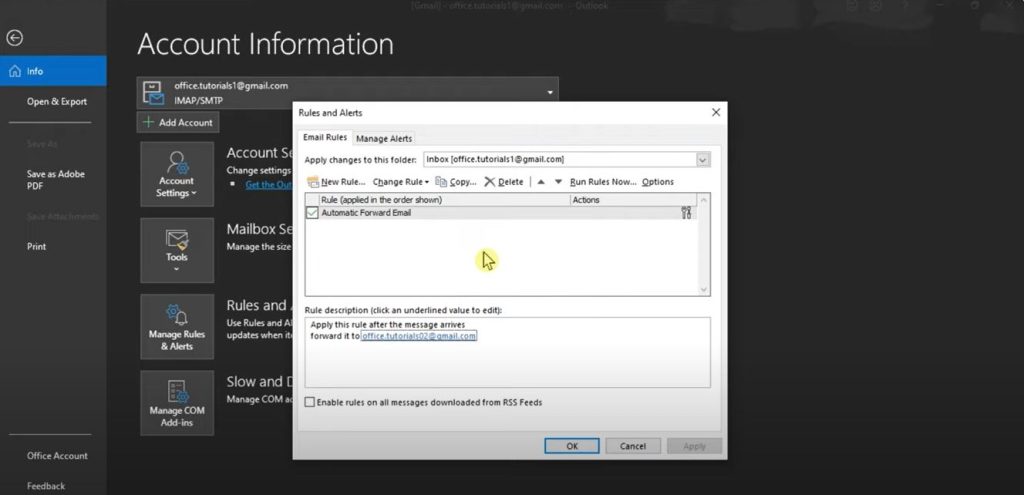
- Open Outlook and go to the File menu.
- Select Manage Rules & Alerts.
- Click on New Rule and choose Apply rule on messages I receive.
- Set the conditions for forwarding (e.g., from a specific sender).
- Choose the action forward it to people or public group.
- Select the recipient to whom the emails will be forwarded.
- Click Finish and then Apply.
Outlook’s auto-forwarding feature lets you send emails to another address and also gives the option to keep a copy in your inbox. To avoid missing messages, always enable the “keep a copy of forwarded messages” setting in your Outlook rules (Microsoft Support, accessed 2025-09-16). Note: organizations can block automatic external forwarding for security; contact your admin if forwarding to outside domains doesn’t work (Microsoft Learn, accessed 2025-09-16).
Pros And Cons Of Automation
| Pros | Cons |
|---|---|
| Saves time by reducing manual tasks.Ensures important emails reach the right people promptly.Reduces the chance of missing critical emails. | Requires initial setup time.May forward irrelevant emails if filters are too broad.Potential security risks if sensitive information is forwarded. |
Automating email forwarding has clear benefits and some drawbacks. Proper setup and regular review of rules and filters can help maximize benefits and minimize risks.
Troubleshooting Forwarding Issues
Forwarding emails in Outlook should be simple. But sometimes, issues arise. Here, we explore common problems and quick fixes to help you troubleshoot.
Common Problems
- Email not sent: Sometimes, your email doesn’t reach the recipient.
- Attachments missing: The forwarded email might lose its attachments.
- Formatting issues: The email’s format may change during forwarding.
- Blocked forwarding: Your email server might block forwarding.
Quick Fixes
Many forwarding issues have simple solutions. Let’s look at them:
- Check your internet connection: Ensure your connection is stable.
- Verify email addresses: Double-check the recipient’s email address.
- Clear cache and cookies: This can solve many browser-related issues.
- Update Outlook: Ensure you have the latest version of Outlook.
- Review email settings: Check your forwarding settings in Outlook.
If you still face issues, try these additional steps:
| Problem | Solution |
|---|---|
| Email not sent | Check your Outbox and resend the email. |
| Attachments missing | Manually attach files before forwarding; for cloud files, ensure recipients have link access (Microsoft Support). |
| Formatting issues | Use the “Forward as Attachment” option (Microsoft Support). |
| Blocked forwarding | Contact your admin; organizations can block automatic external forwarding by policy (Microsoft Learn). |
By following these steps, you can resolve most forwarding issues in Outlook. Remember to always check your settings and keep your software updated.
Frequently Asked Questions
Does forwarding an email include attachments in Outlook?
Yes—when you forward an email, file attachments are included by default. If the message used cloud attachments (OneDrive/SharePoint), those forward as links and recipients need permission (Microsoft Support; Microsoft Support).
Will the sender know I forwarded their email?
No—Outlook does not send an automatic notification to the original email sender when you forward a message (Microsoft Support). Note: Forwarding a meeting invite usually notifies the organizer (Microsoft Support).
How Do I Forward An Email In Outlook?
To forward an email in Outlook, open the email and click the “Forward” button. Enter the recipient’s email address, add a message if needed, and click “Send.”
Can I Forward Multiple Emails At Once In Outlook?
Yes—on Outlook for Windows or Mac, select multiple emails and use Forward as Attachment to send them in one message (Microsoft Support). On the web, you can forward messages as attachments, though multi-select options may vary by tenant and version; attach additional .eml files if needed (accessed 2025-09-16).
Does Forwarding An Email In Outlook Include Attachments?
Yes, forwarding includes file attachments by default (Microsoft Support). For cloud files, Outlook sends links that use your organization’s default permissions (Microsoft Support).
How To Edit The Forwarded Email In Outlook?
To edit a forwarded email, open the email, click “Forward,” and make changes in the email body before sending.
Conclusion
Forwarding an email in Outlook is simple and effective. Follow the steps outlined, and you’ll save time. Remember to check your forwarded messages. This ensures clarity and avoids confusion. Practice regularly to become comfortable with the process. With these tips, you can manage emails more efficiently.
Keep your communication clear and professional. Happy emailing!