

Want to send the same email every week or month? Power Automate makes it easy. With just a few steps, you can set up a recurring email in Power Automate—no coding needed.
This guide will show you how. Power Automate, a part of Microsoft’s Power Platform, helps automate tasks. One common task is sending recurring emails. Automating this can save time and ensure consistency. Whether you need to send weekly reports or monthly reminders, Power Automate makes it easy.
In this post, we’ll walk you through the steps to set up recurring emails. You don’t need advanced technical skills. Just follow along, and you’ll have automated emails in no time. Let’s get started!

Introduction To Power Automate
Power Automate is a powerful tool by Microsoft. It helps automate tasks and workflows. With Power Automate, you can save time and reduce errors. One popular use is sending recurring emails. This guide will show you how to do that.
Contents
What Is Power Automate?
Power Automate, formerly known as Microsoft Flow, is a cloud-based service. It allows users to create automated workflows between apps and services. These workflows can help you synchronize files, get notifications, and collect data. You can use it with Microsoft 365, Dynamics 365, and many other applications.
Benefits Of Using Power Automate
There are several benefits to using Power Automate:
- Time-saving: Automate repetitive tasks and focus on more important work.
- Consistency: Reduce errors by ensuring tasks are done the same way every time.
- Efficiency: Streamline processes and improve productivity.
- Integration: Connect various apps and services to create a seamless workflow.
Power Automate makes it easy to automate tasks. You can create workflows without coding knowledge. This means anyone can use it. Sending recurring emails is just one of the many tasks you can automate.
Example: Sending A Recurring Email
Here’s a quick example of how to create a recurring email flow using Power Automate. This works great for reminders, reports, or regular updates.
- Open Power Automate and sign in.
- Click on “Create” and select “Scheduled cloud flow“.
- Set the recurrence schedule (e.g., daily, weekly).
- Add a new step and select “Send an email (V2)”.
- Fill in the email details (recipient, subject, body).
- Save the flow and test it.
That’s it! You have now set up a recurring email with Power Automate. This is just a basic example. You can customize it further based on your needs.

Setting Up Power Automate
Before you can start sending recurring emails through Power Automate, you’ll need to get set up with a Microsoft account. This gives you access to Power Automate and other tools for automating email tasks. This process involves creating a Microsoft account and accessing Power Automate. Let’s walk through these steps to get you started.
Creating A Microsoft Account
Before using Power Automate, you need a Microsoft account. If you do not have one, follow these steps:
- Visit the Microsoft Sign-Up Page.
- Enter your email address, phone number, or create a new email address.
- Follow the prompts to complete the registration.
Having a Microsoft account allows you to access various Microsoft services, including Power Automate. Ensure your account is verified to avoid any access issues.
Accessing Power Automate
Once your Microsoft account is ready, you can access Power Automate:
- Go to the Power Automate website.
- Click on the “Sign in” button located in the top right corner (the flow designer opens at make.powerautomate.com).
- Enter your Microsoft account credentials to log in.
After logging in, you will see the Power Automate dashboard. From here, you can create and manage your workflows, including setting up recurring emails.
With these steps completed, you are now ready to dive into the world of automation. Power Automate offers a user-friendly interface, making it easy to create automated workflows.
Creating A New Flow
Creating a new flow in Power Automate is essential for sending recurring emails. This section will guide you through the steps of setting up a new flow.
Starting A New Flow
To start a new flow, follow these steps:
- Open Power Automate from your Microsoft 365 app launcher.
- Click on Create from the left-side menu.
- Select Scheduled cloud flow from the options available.
These steps will take you to the flow creation screen.
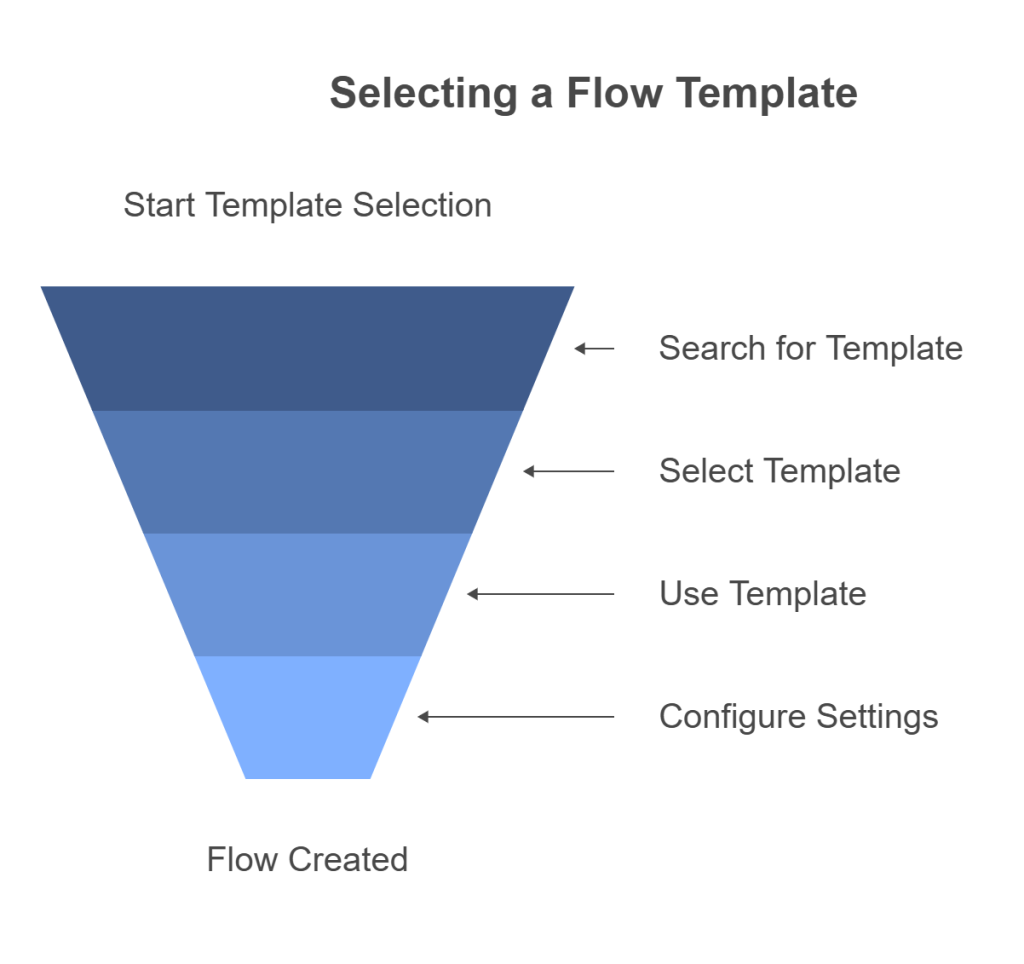
Choosing A Flow Template
Templates are pre-built flow structures. They make the setup easy and fast.
To choose a flow template:
- On the flow creation screen, type recurring email in the search bar.
- Select a template that matches your needs. For instance, “Send a recurring email.”
- Click on Use this template.
Templates often require configuring some settings. Ensure you complete all fields.
Using a template simplifies the process of creating a new flow.
Configuring Recurring Triggers
To automate recurring emails, you’ll need to configure a scheduled trigger. Power Automate lets you send emails daily, weekly, or monthly based on your needs. Whether it’s sending a weekly report or a monthly reminder, recurring triggers ensure your emails go out on time without manual intervention. Here’s how to configure them effectively.
Selecting A Trigger
First, navigate to the Power Automate dashboard. Click on Create to start a new flow. Choose Scheduled flow to set up a recurring task. This trigger allows you to automate actions based on a set schedule.

Setting Frequency And Timing
After selecting the trigger, set the frequency and timing of your emails. You can choose from various options such as:
- Daily
- Weekly
- Monthly
For more specific timing, you can use advanced settings to define the exact time of day or day of the week for the emails to be sent.
Here’s an example of how to set a weekly email:
| Frequency | Timing |
|---|---|
| Weekly | Every Monday at 8:00 AM |
Fill in the details as per your requirement and click Save. This will ensure your emails are sent at the specified times without any manual effort.
Adding Actions To The Flow
Adding actions to your flow in Power Automate is crucial. These actions define what your flow will do. For sending a recurring email, you must choose the right actions. This ensures your email sends correctly at the scheduled time.
Choosing Email Action
First, you need to choose the email action. Follow these steps:
- Open Power Automate.
- Create a new flow or edit an existing one.
- Click on New Step.
- Search for “Send an email (V2)” action.
- Select the action from the list.
This action allows you to send an email. It’s important to choose this specific action for full functionality.
Configuring Email Details
Next, you need to configure the email details. Fill in the required fields:
- To: Enter the recipient’s email address.
- Subject: Write a clear and concise subject.
- Body: Compose the email content.
| Field | Description |
|---|---|
| To | Recipient’s email address. |
| Subject | Email subject line. |
| Body | Content of the email. |
Ensure all details are correct. This avoids any errors in the email sending process. You can also add dynamic content to personalize the email.
Testing The Flow
Once you have set up your recurring email flow in Power Automate, it is essential to test it. Testing helps to ensure that your flow works as expected and that your emails are sent correctly and on time. This section will guide you through the steps of running a test and checking the results.
Running A Test
To begin testing your flow, follow these steps:
- Go to your Power Automate dashboard.
- Navigate to your created flow.
- Click on the “Test” button on the top right corner.
- Select “I’ll perform the trigger action”.
- Click on “Save & Test”.
Now, perform the action that triggers your flow. If your flow is set to send an email at a specific time, adjust the time settings for testing purposes. This ensures that the trigger action occurs immediately.
Checking The Results
After running the test, check if the flow executed successfully:
| Step | Description |
|---|---|
| Check Flow Run | Go to the “Run History” tab. Here, you can see the details of your flow run. |
| Verify Emails | Check your inbox for the test email. Ensure it has the correct content and was sent at the right time. |
| Review Logs | In the “Run History”, click on the latest run. Review the logs for any errors or warnings. |
If everything looks good, your flow is ready for use. If there are issues, go back and adjust the settings or logic in your flow. Testing is crucial to ensure that your recurring emails are reliable and accurate.
Troubleshooting Common Issues
Sending recurring emails with Power Automate is usually smooth. But sometimes, you might face issues. Here, we will discuss common problems and how to fix them.
Error Messages
Encountering error messages can be frustrating. Here are some common errors and their solutions:
- Authentication Failed: Ensure your credentials are correct. Check if your account has the necessary permissions.
- Invalid Parameters: Verify that all fields are filled correctly. Check data types and formats.
- Quota Exceeded: Be aware of platform and email sending limits (for example, Exchange Online recipient and tenant outbound limits) and connector throttling. If you hit limits, retry later or consider alternatives for bulk email.
Flow Not Triggering
If your flow is not triggering, consider these troubleshooting steps:
- Check Triggers: Ensure the trigger conditions are correctly set. Incorrect settings can prevent the flow from starting.
- Review Connections: Verify that all connections are active. Re-authenticate if necessary.
- Monitor Logs: Check the flow’s run history. Look for any error messages or skipped runs.
- Test Manually: Run the flow manually to see if it triggers. This helps identify if the issue is with the trigger or the flow itself.
Troubleshooting can save time and effort. Address these common issues, and your recurring emails in Power Automate should work smoothly.
Best Practices
Power Automate is a reliable way to automate reminder emails and regular updates. To keep your flows running smoothly, follow these tips. To ensure smooth operation, follow these best practices. They will help you maintain reliability and monitor your automation process effectively.
Ensuring Reliability
Reliability is crucial for recurring emails. Ensure each email reaches its destination on time.
- Test your flow: Before going live, test the flow multiple times. This helps identify potential issues.
- Use clear subject lines: A clear subject line avoids confusion. Recipients know what the email is about at a glance.
- Maintain a clean contact list: Regularly update your contact list. Remove inactive or incorrect email addresses.
- Respect limits: High-volume or bulk external sending is restricted in Exchange Online, and connectors have throttling. If you need to message large external audiences, consider services designed for bulk email.
Monitoring And Maintenance
Monitoring and maintenance are key to a successful email flow. Regular checks ensure everything runs smoothly.
- Set up notifications: Configure Power Automate to notify you of any failures. This allows quick action.
- Review logs: Regularly check the logs in Power Automate. Logs can help identify and fix issues.
- Update content: Periodically update email content. Keeping information current ensures relevance.
Following these best practices will help you send recurring emails efficiently. It will also reduce the chances of errors and maintain a smooth workflow.
Frequently Asked Questions
Can Power Automate send recurring emails with attachments?
Yes. Use the email action to add static or dynamic attachments to scheduled flows.
How often can I send recurring emails in Power Automate?
You can set them to run daily, weekly, monthly, or at custom intervals.
Is Power Automate good for sending reminders?
Yes, it’s ideal for automating reminder emails for meetings, tasks, and follow-ups.
How Do I Set Up Recurring Emails In Power Automate?
To set up recurring emails in Power Automate, use the “Recurrence” trigger within a Scheduled cloud flow. Then, configure the email action with your desired details.
Can Power Automate Send Daily Emails?
Yes, Power Automate can send daily emails. Use the “Recurrence” trigger and set it to daily frequency.
Is Power Automate Free To Use?
Power Automate includes a Power Automate Free license for work/school accounts with standard connectors and basic cloud/desktop automation. Advanced features and premium connectors require a paid license. Trials are available.
Can I Schedule Emails In Power Automate?
Yes, you can schedule emails in Power Automate. Use the “Recurrence” trigger to define the schedule.

Conclusion
Sending recurring emails with Power Automate is simple and efficient. This tool saves time and ensures consistency. Follow the steps to set up your flow. Adjust the settings to fit your needs. Test the flow to make sure it works correctly.
Enjoy the benefits of automated emails. Your tasks become easier with automation. Start using Power Automate today to streamline your email process. Keep your communication steady and reliable. Happy automating!