
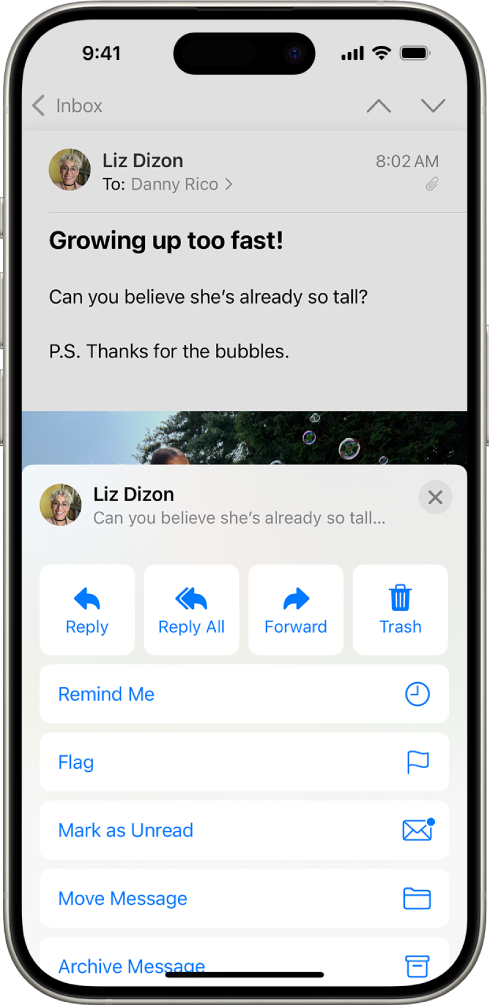
Forwarding all emails to another email on an iPhone is simple. This process helps you manage multiple email accounts efficiently.
In today’s fast-paced world, keeping up with emails can be challenging. Having all your emails in one place can save time and reduce stress. iPhone’s built-in Mail app allows you to forward emails easily. Important: there’s no global auto-forward switch inside iOS Mail; to forward all emails on iPhone, set up automatic forwarding with your email provider (e.g., Gmail, Outlook, iCloud Mail) and then read the forwarded mail on your iPhone (Apple Support; Google Support; Microsoft Support; iCloud Mail User Guide).
By the end, you’ll know how to forward all emails to another email on your iPhone. It’s straightforward and quick. Let’s dive in to streamline your email management.
Credit: support.apple.com
Preparing Your Iphone
Before you forward all emails to another email on your iPhone, you must prepare your device properly. This ensures a smooth and error-free process. Follow these steps to get your iPhone ready.
Check Ios Version
Ensure your iPhone is running the latest iOS version. An updated iOS version ensures compatibility with new features. Follow these steps to check your iOS version:
- Open the Settings app on your iPhone.
- Scroll down and tap on General.
- Tap on About.
- Look for the Software Version field.
If your iOS is not up to date, you will need to update it. Here’s how:
- Return to the General menu in Settings.
- Tap on Software Update.
- Follow the on-screen instructions to download and install the update.
Ensure Internet Connection
A stable internet connection is crucial for forwarding emails. Make sure your iPhone is connected to Wi-Fi or has a strong cellular signal. Follow these steps to check your connection:
- Open the Settings app on your iPhone.
- Tap on Wi-Fi and ensure it is turned on.
- Verify that you are connected to a reliable Wi-Fi network.
- If using cellular data, go back to Settings and tap on Cellular.
- Ensure Cellular Data is enabled and showing a strong signal.
Having a stable internet connection ensures that all your emails are forwarded without interruption. If you experience connectivity issues, try restarting your device or resetting your network settings.
Setting Up Email Forwarding
Forwarding all your emails to another email account can save you time. You won’t need to check multiple accounts. This guide helps you set up email forwarding for the accounts you use on iPhone. Reminder: there isn’t a “Forwarding” toggle in iOS Settings → Mail. Set up forwarding with your email provider, then read the forwarded mail on your iPhone (Apple Support).
Open Settings App
Open Settings if you need to add the destination mailbox to your iPhone so you can read forwarded emails (Settings → Mail → Accounts → Add Account). You do not enable automatic forwarding here; that’s done with your provider (see below).
Access Mail Settings
Use your provider’s web settings to turn on forwarding:
- Gmail: On the web, go to Settings → See all settings → Forwarding and POP/IMAP → Add a forwarding address (Google Support).
- Outlook / Outlook.com / Microsoft 365: Go to Settings → Mail → Forwarding (web) or create a rule; admins can manage org policies (Microsoft Support; Microsoft Learn).
- iCloud Mail: On iCloud.com go to Settings → Mail Forwarding to forward all messages (and optionally delete after forwarding) (Apple iCloud User Guide).
- Yahoo Mail: Auto-forwarding requires a paid plan (Mail Plus or Access + Forwarding) (Yahoo Help).
Add Account
Next, tap on Add Account in iOS Settings → Mail → Accounts to add the destination address (the mailbox that will receive forwarded emails). Choose your provider, sign in, and complete the prompts so your forwarded mail appears in the Mail app.
Enable Forwarding
Turn on forwarding in your provider’s settings (see links above). Example: In Gmail, add and verify a forwarding address, then choose whether to keep a copy in Gmail (Google Support). In Outlook on the web, enable Forwarding and optionally keep a copy (Microsoft Support). In iCloud Mail, use Mail Forwarding on iCloud.com (Apple iCloud User Guide).
Confirm And Save
After entering the forwarding address, save changes and, if applicable, verify the address (Gmail sends a verification link). Your emails will now be forwarded to the new address (Google Support).
| Step | Action |
|---|---|
| 1 | Open Settings App (to add destination account on iPhone) |
| 2 | Access provider’s web settings (Gmail/Outlook/iCloud) |
| 3 | Add Account (destination) on iPhone to read forwarded mail |
| 4 | Enable Forwarding in provider settings |
| 5 | Confirm and Save (verify if prompted) |
Contents
Configuring Email Account
Forwarding emails to another account on your iPhone is a convenient feature. It ensures you never miss an important message. This guide will help you configure your email account to forward all emails using your provider’s settings while you read them on iPhone.
Select Email Account
On your iPhone, open Settings → Mail → Accounts, then select Accounts to ensure both the original and destination accounts are set up for viewing. The auto-forward itself is controlled by your provider (see links above).
Enter Forwarding Address
In your email provider’s web settings, find Forwarding (or Rules) and enter the destination email address. In Gmail you must verify the address via a confirmation email before forwarding starts (Google Support). In iCloud Mail you can also choose to delete messages after forwarding (Apple iCloud User Guide).
By following these simple steps, you can easily configure your email account to forward all emails to another email address and read them on your iPhone.
Verifying Forwarding Setup
Once you have set up email forwarding, it’s crucial to verify the setup. This ensures all your emails are correctly forwarded to the new email address.
Send Test Email
First, send a test email to your original email address. This helps you check if the forwarding rule is working.
- Open your email app on your iPhone.
- Compose a new email.
- Send it to your original email address.
Wait for a few minutes. This gives the email time to process and forward.
Check Forwarded Email
Next, check the new email address for the forwarded email. This step confirms the email was successfully forwarded.
- Open your email app on the destination mailbox.
- Look for the test email you sent.
If the email is in the inbox, the forwarding setup works. If not, you may need to review your settings. For Microsoft 365 or work/school accounts, admins may block external forwarding for security (Microsoft Learn).
Remember to check the spam or junk folder. Sometimes forwarded emails land there.
Troubleshooting Common Issues
Experiencing issues while trying to forward all your emails to another email on your iPhone? You are not alone. Sometimes, things don’t work as expected. Here are common problems and how to fix them.
Check Spam Folder
Sometimes, forwarded emails end up in the spam folder. This happens due to email filters. To check:
- Open the Mail app on your iPhone.
- Go to the Mailboxes screen.
- Select the Spam or Junk folder.
- Look for your forwarded emails.
If you find them here, mark them as Not Spam. This will help future emails go to your inbox.
Verify Forwarding Address
Ensure the forwarding address is correct and verified. Gmail requires clicking a verification link before forwarding starts (Google Support).
Provider or Admin Policies
Some services limit auto-forwarding: Yahoo requires a paid plan (Yahoo Help), and Microsoft 365 admins can disable external forwarding (Microsoft Learn).
Advanced Tips
After learning the basic steps to forward all emails on your iPhone, you might want to explore more advanced tips. These tips will help you manage your emails more efficiently and customize your email forwarding settings to suit your needs.
Using Email Filters
Email filters and rules help you forward only certain messages:
- Gmail: Create a filter (e.g., by sender, subject, or keyword) and set the action to Forward it (Google Support).
- Outlook (web): Go to Settings → Rules and create a rule that forwards or redirects emails that match your conditions (Microsoft Support).
- iCloud Mail: Use Rules on iCloud.com to forward only specific messages (Apple iCloud User Guide).
Using filters can help you ensure that only relevant emails are forwarded, keeping your inbox organized and clutter-free.
Setting Up Multiple Forwarding Rules
You can set up multiple rules to forward different types of emails to different addresses. Create separate filters (Gmail) or rules (Outlook/iCloud) for each condition and forwarding destination (provider limits may apply) (Google Support; Microsoft Support; Apple iCloud User Guide).
| Feature | Description |
|---|---|
| Filters | Forward specific emails based on criteria (Gmail filters, Outlook/iCloud rules). |
| Multiple Forwarding Rules | Forward different types of emails to different addresses with separate rules. |
These advanced tips will help you take full control of your email forwarding on your iPhone. Implementing these strategies will save you time and effort, ensuring you never miss an important email.

Frequently Asked Questions
How Do I Forward All Emails On My Iphone?
Use your email provider’s automatic forwarding on the web (Gmail, Outlook, iCloud Mail). There is no system-wide auto-forward toggle in iOS Mail (Apple Support).
Can I Automatically Forward Emails On Iphone?
Yes—via your provider. Set up forwarding in Gmail, Outlook, or iCloud Mail, then read the forwarded messages in the iPhone Mail app (Google Support; Microsoft Support; Apple iCloud User Guide).
Is Email Forwarding Possible On Iphone Mail App?
You can manually forward individual emails in the Mail app, but automatic forwarding of all mail is configured with your email provider (Apple Support).
What Steps To Set Up Email Forwarding On Iphone?
Add the destination account on your iPhone for reading, then enable forwarding in your provider’s web settings (Gmail/Outlook/iCloud). Verify the address if prompted and test with a sample email (Google Support; Microsoft Support).
Conclusion
Forwarding emails on your iPhone is simple and efficient when you activate auto-forwarding with your email provider and then read the forwarded messages in Mail. Follow these steps, and you will stay organized. This approach saves time, ensuring you never miss important messages.
Try this method today and streamline your email routine effortlessly. For safety, periodically review any active forwarding you didn’t set yourself (Apple Personal Safety). Happy emailing!